1. Get to know microcement
Introduction
What do you think of when you hear the word cement? How to apply microcement by 6 steps?
Likely, a few things come to mind: concrete, mortar, and maybe even paving stones.
But what if we told you there was another kind of cement out there – one that’s lighter, more flexible, and can be used on just about any surface?
It’s called microcement, and it’s becoming an increasingly popular choice for businesses looking for an affordable and versatile flooring option.
In this post, we’ll introduce you to how to apply microcement, where it can be applied, and discuss some of its key benefits. So why don’t you read on to learn more?

2. Why choose microcement applications
Microcement is a type of cement that is mixed with water to create a very thin, smooth paste. It is typically used to create smooth, seamless surfaces on walls and floors.
Micro cement can also be used to create decorative effects, such as stenciling, inlaying, and embossing. When properly applied, it can create a durable, low-maintenance surface that is both aesthetically pleasing and easy to clean.
However, microcement is not suitable for all applications; it should only be used on surfaces that are structurally sound and free from gaps or cracks.
In addition, microcement should not be applied in areas where there is a risk of exposure to excessive moisture or heat. If you are considering using it for a project, be sure to consult with a professional to ensure that it is the right material for the job.
3. Decide where microcement you want to be applied?
If you’re like most business owners, you’re always on the lookout for new ways to improve your operations.
And if you’re looking for a versatile and affordable flooring solution, you should definitely consider microcement flooring.
This unique material can be applied in a variety of settings, from retail shops to restaurants. So if you’re looking for a floor that will make a statement, microcement is definitely worth considering.
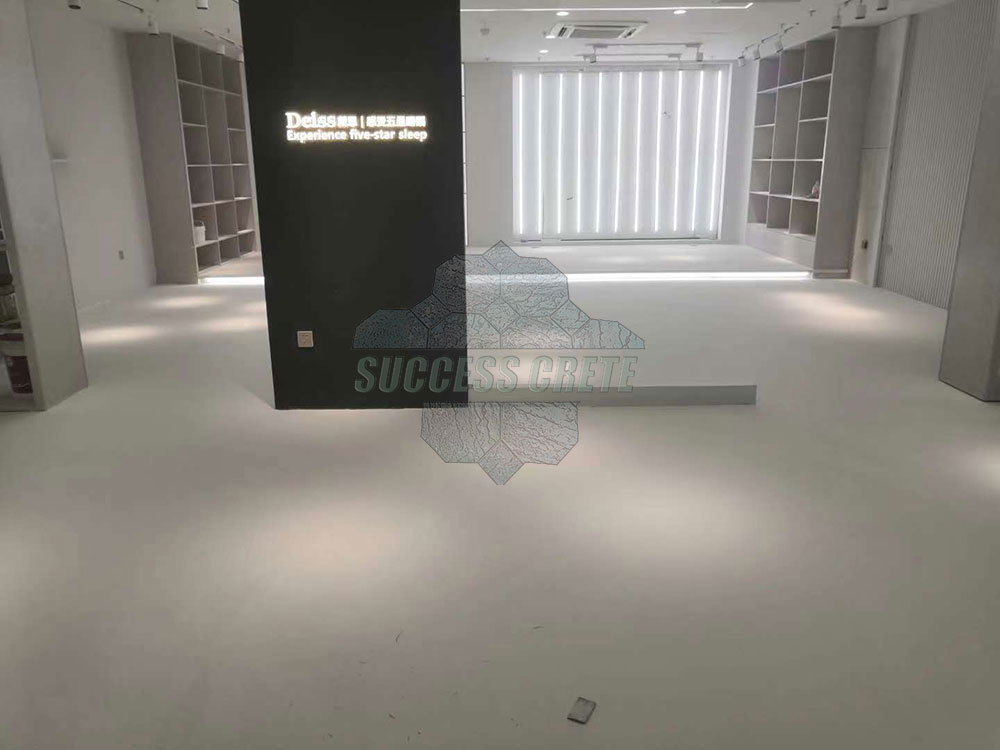
Microcement is becoming increasingly popular as a material for both indoor and outdoor applications. It is ideal for use in wet areas such as bathrooms and kitchens, as it is highly water resistant.
In addition, microcement can be used to create seamless finishes on floors and walls. It is also becoming increasingly popular for use in outdoor areas, such as patios and balconies.
Thanks to its durability, microcement is an excellent choice for high-traffic areas. When properly installed, it can last for many years with minimal maintenance.
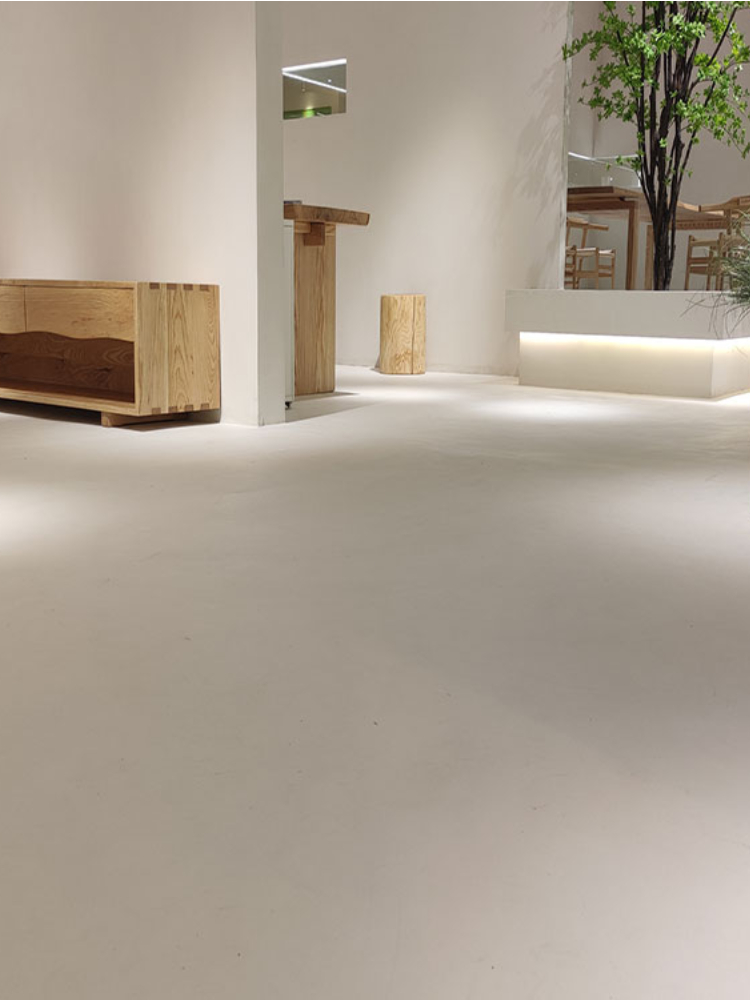
4. Choose the right color and finish for your project
When starting a new project, it’s important to choose the right color and finish.
Different colors and finishes can create different moods and atmospheres, so it’s important to select the right one for your project. There are many different options available, so it’s important to do your research and find the best one for you.
Talk to professionals who can help you make the best decision for your needs. With the right color and finish, you can create a beautiful finished product that will exceed your expectations.
Whether you’re looking to add a new accent wall or completely transform your space, microcement is a great option.
This versatile material can be used in a variety of ways, from floors and walls to countertops and backsplashes.
And with so many color and finish options available, you’re sure to find the perfect look for your project.
When choosing a color for your microcement, consider both the overall look you want to achieve and the specific features of the space.
For example, darker colors can help to create a more dramatic effect, while lighter colors can make a space feel more open and airy.
If you’re not sure where to start, why not try a neutral tone? You can always add pops of color with accessories and furnishings.
Once you’ve settled on a color, it’s time to choose a finish. A glossy finish will help to reflect light and make a space feel larger, while a matte finish can give your microcement a more natural look.
If you’re unsure which option is right for you, ask for samples from your supplier so you can see the different effects in person.
With so many possibilities available, there’s no reason not to experiment until you find the perfect combination for your project!
5. Prepare the surface for application
Introduction
Are you planning to apply microcement on your surface?
If so, proper preparation is essential in order to achieve the best results. In this blog post, we will share some tips on how to prepare the surface for microcement applications.
So read on and get started!
- The surface must be completely sound, structurally stable, and free from any loose material, dirt, grease, process oils, or other contamination that could impede microcement adhesion.
- Newly laid concrete must be given time to cure (28 days is ideal) and should be slightly rough to provide a good ‘key’ for the microcement.
- If the surface is perfectly smooth, abrading or ‘roughening up with light sandpaper will improve microcement adhesion.
- Once the surface is prepared, it should be cleaned with a microfibre cloth and appropriate cleaners to remove any final traces of dust or grease.
- Once dry, a primer should be applied following the manufacturer’s instructions. The primer will help the microcement to achieve optimal bonding strength.
- After the primer has dried, the microcement wall can be mixed and applied according to the manufacturer’s instructions.
- Microcement can be applied in thin layers, and the first coat is typically 500 to 700 microns (0.5 – 0.7 mm) thick. The microcement mix hardens quickly, and the final coat can be given a variety of textures and finishes.
- Sanding is an important part of microcement applications. It helps to remove all excess material and provide a basic texture for the entire future micro-concrete surface. This ensures that the microcement adheres properly and provides a smooth finish. Sanding also helps to create a uniform surface, which is essential for achieving consistent results.
- The microcement applications in the second layer help to emphasize the previously defined texture. This layer is only 700 to 1000 microns (0.7 – 1 mm) thick, but it can make a big difference in the look and feel of your surface.
- After microcement applications, it’s important to sand the surface to remove any waviness or roughness. This will ensure a smooth, even finish. Use medium-grit sandpaper to start, and then finish with fine-grit paper. Go over the entire surface until it’s smooth to the touch.
- Once the microcement application has dried, it’s time to apply another layer of sealant. This will form a strong protective film on the surface, helping to keep your looking its best for longer.
There’s something about a well-done concrete finish that just feels so solid, reliable, and permanent. You can’t help but feel like it’s going to last forever.
And, if you’re looking for a way to add some extra finishing touches to your business, then please read more…
After the microcement is applied, it’s time for the finishing touches. First, any imperfections in the surface should be repaired.
Once the surface is smooth, it can be sealed with a clear sealer to protect it from dirt and stains. Finally, the microcement can be waxed to give it a glossy finish. With proper care, a micro cemented surface can last for many years.
These include adding texture, color, and patterns to the surface.
The best way to add texture is to use a trowel or other tool to create ridges, swirls, or other shapes in the wet cement.
For color, you can either use tinted cement or add pigment to the wet mix.
Pigments are available in a wide range of colors, so you can get creative with your design. Finally, patterns can be created by using stencils or stamps.
Once you’ve added all the finishing touches, you’ll need to wait for the cement to dry completely before walking on it or adding furniture. With a little creativity, you can transform any room with microcement.

The Last Step
Microcement is a great way to update your flooring without the hassle of traditional renovation methods. But what do you do after the installation is complete?
Here are some best tips for finishing touches that will make your microcement shine.
- Add a sealant. A good sealant will protect your microcement from spills and other minor accidents. It will also help keep it looking new for longer.
- Consider a coat of paint or polish. You can give your microcement an extra touch of color or sheen by painting or polishing it after installation. This is especially recommended if you have light-colored flooring with a subtle pattern.
- Add furniture and decorations. Once your flooring is in place, you can start decorating! Place furniture and rugs where you want them, and hang up pictures or plants to add personality to the space. With these finishing touches, your microcement installation will be complete!
ConclusionMicrocement is extremely strong and durable, making it an ideal choice for high-traffic areas. It can also be textured or tinted to create unique effects. Applying it is a multi-step process that requires the use of special tools and equipment. While it is possible to do it yourself, it is generally best to hire a professional contractor to ensure a high-quality finish.